
Welcome back, and Happy Thanksgiving to all my American friends; I hope that you had a wonderful day yesterday and are not feeling too many ill-effects from the feasting and general revelry.
Today’s post comes courtesy of Harry, who will take you through the messy-but-highly-enjoyable art of button craft. Yesterday here was wet, grey and miserable, so we spent our evening covered in glue and sparkles, humming off-key snippets of Christmas carols whilst making cards for Harry to give to his grandparents and teachers; I can thoroughly recommend it. You’ll need;
- Green craft paper
- Lots of buttons of different shapes and sizes; (we used these but any assortment will do)
- White glue
- Blank cards or cardstock to mount your trees onto at the end
- A bathtub that your small assistant can be dropped into the moment that the glue-based activity is done
Firstly, cut out a set of Christmas tree-shaped triangles, and pour a small bowl of white glue. Stir vigorously. Ignore buttons and card and focus on the glue. Force yourself to return to the job in hand.

After applying glue liberally to the tree, place as many buttons as you can on the shape, in any order and pattern. Remember, you can never have too many buttons, and you can certainly never have too much glue. Don a Santa hat to further increase the festive mood.

Add more glue.

Place the shapes to dry on a baking rack (this will probably take overnight). To kill a bit of time whilst you wait, you can punch out a few snowflakes to place around the button tree. We used a Martha craft punch and had a competition to see who was the strongest at squeezing the punch. I am proud to say that I won. And also embarrassed; there’s little glory in being stronger than a three-year old, after all.

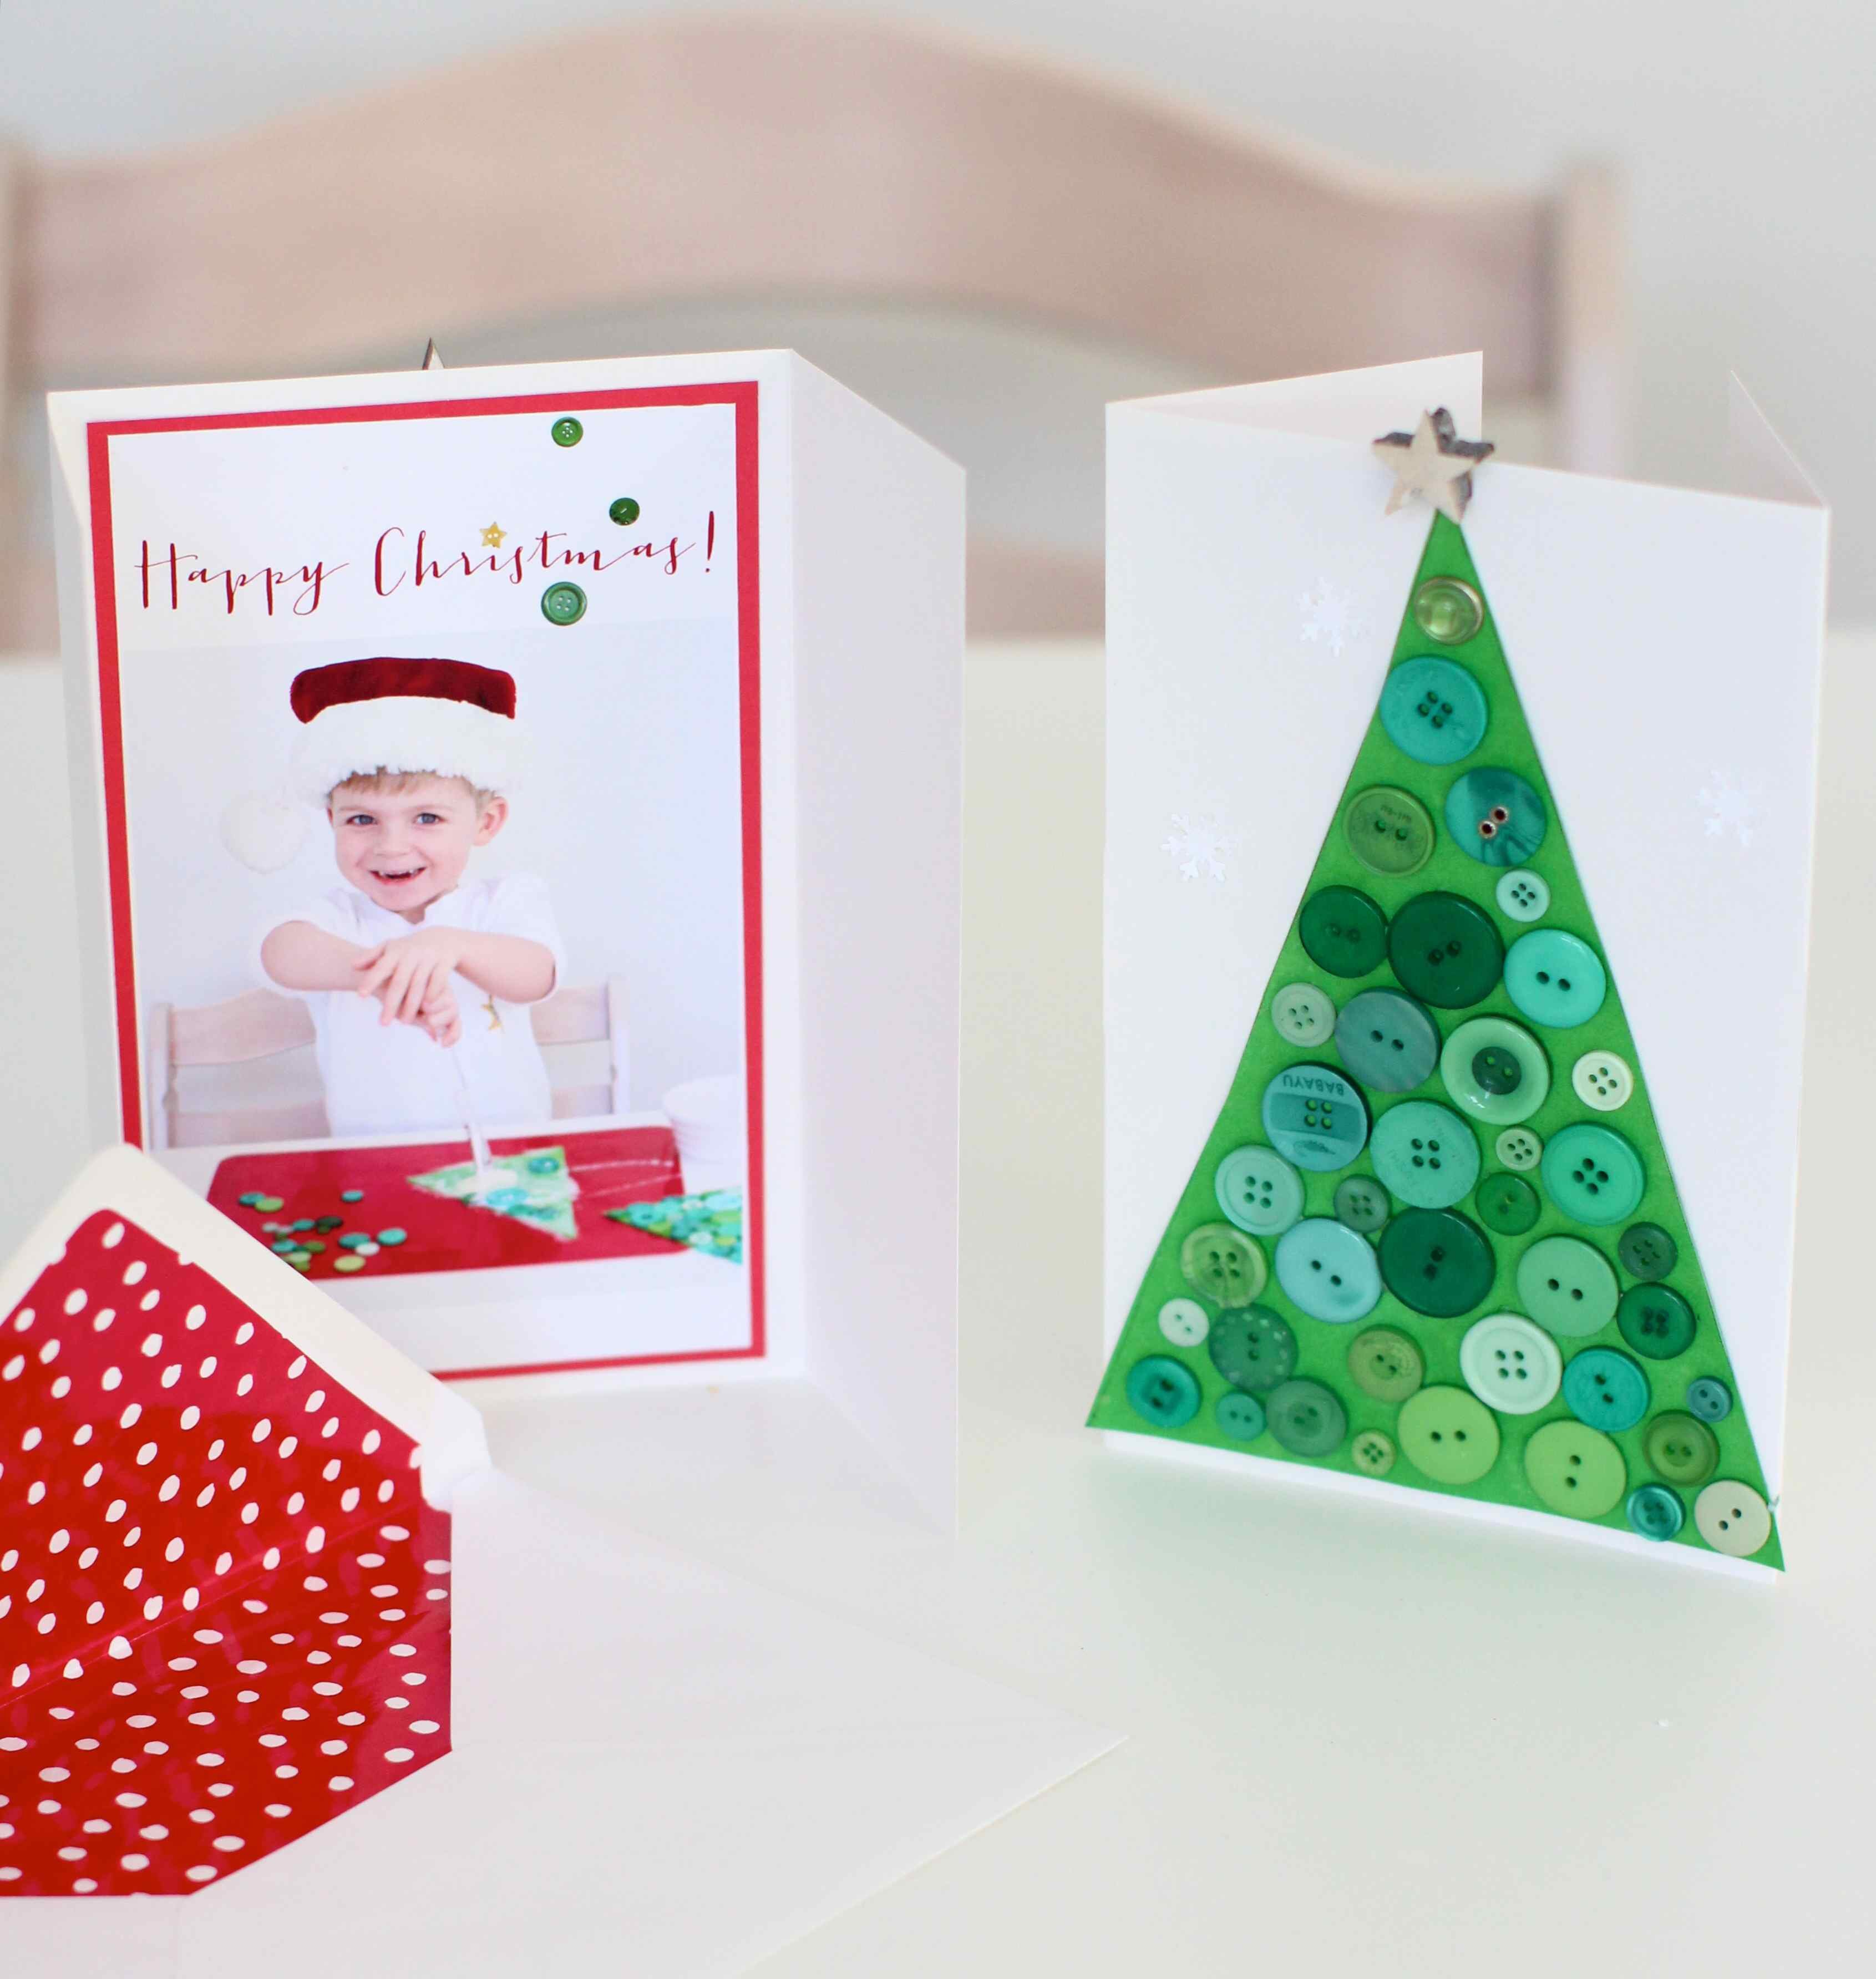
The glue will dry completely clear, leaving you with beautiful trees which give no hint of the mess and chaos involved in their production. Mount them onto cards; we also added a little wooden star to each, plus a few of our punched-out snowflakes;

I then pimped the plain envelopes by using scraps of gift-wrap to make envelope liners (a quick how-to on this next time; you can practically do it one-handed with a glass of wine / eggnog / green detox juice in the other).

I chose gatefold cards which I found on sale here during our recent holiday to the US; I wanted to add a photo of Harry making the cards so that everyone who received one got to share in the fun of the work-in-progress; you could just as easily slip a photo inside a regular card. Ours stand up so that on one side you have the tree, and the other the photo and space for a hand-written message down the side.

So our first phase of Christmas crafting is complete, and our glue-dipped paintbrushes in for a very, very long soak. This weekend brings a long-awaited pirate birthday party, family visits and much celebration, so we’ll be busy… I hope that you have a lovely one, wherever you are and whatever you’re doing.
![]()
Lovely! I haven’t even thought about Christmas cards yet, let alone bought any. Maybe I will even manage to make some instead this year…
Well done Harry. His cards are beautiful. Who wouldn’t like to receive one of those.
So dang cute! And look at Mr Harry all getting his craft on. Him and my daughter would do well making a disaster of a kitchen table together.
Lovely!
I just love your blog and all the fun you have with Harry!
Just a thought for your cards. I always make my own too and one Christmas part of the decoration on the card was a very small bell. Royal Mail rated them as large letter/small parcel and all my friends had to pay an extra fee to collect them! Moral of the story is always make and send one card to yourself first to check the postman is happy with it!
Wonderful, Harry! I am sure your teachers and family and friends will love your cards. They are a gift all of their own.
What a cutie your little button is – Happy Birthday to Harry this weekend, hope he has great fun at his Pirate Party. Lucky recipients of his cards, they are fabulous!
What an awesome idea!! You are genius!!
love this idea and your execution is first-class, as usual. Excellent photography at every step. Best from New Orleans, USA.
Great idea! This is a must do for Finn and I…off to find some buttons!
Fun photos too!
Congratulations, your blog has been nominated for NEPALIAUSTRALIAN’s Blog Award 2013. Please click the link for more details.
http://nepaliaustralian.com/2013/12/02/nepaliaustralians-blog-award-2013-nominations-announced/
Love how these go from truly messy to truly lovely – fantastic!
Amazing… Love his beautiful smile as he makes his creation…